How to digitally sign a Word document?
A user can digitally sign word documents using the eMudhra digital signature certificate.
Below are the steps to be followed to digitally sign a Word document:
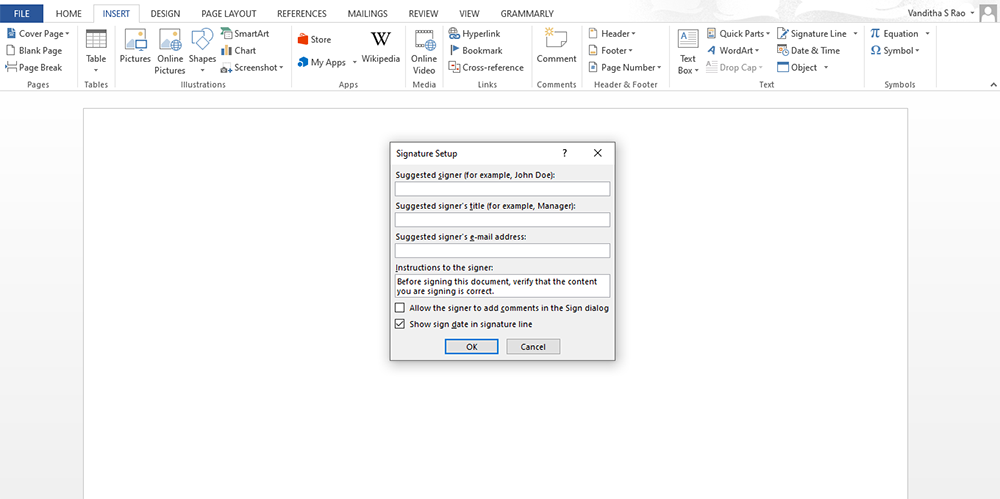
Step 1: Open the saved document on your computer to be digitally signed. Select the place on the document where you want to add the signature line. Go to the Insert tab and click on "Signature line" in the text group.
Step 2: A "signature setup" box will pop up. Enter the signer's name, title, email address, and instructions to the signer. You can opt to show the signing date in the signature line and/or allow comments in the sign dialog box. Click on OK button to continue.
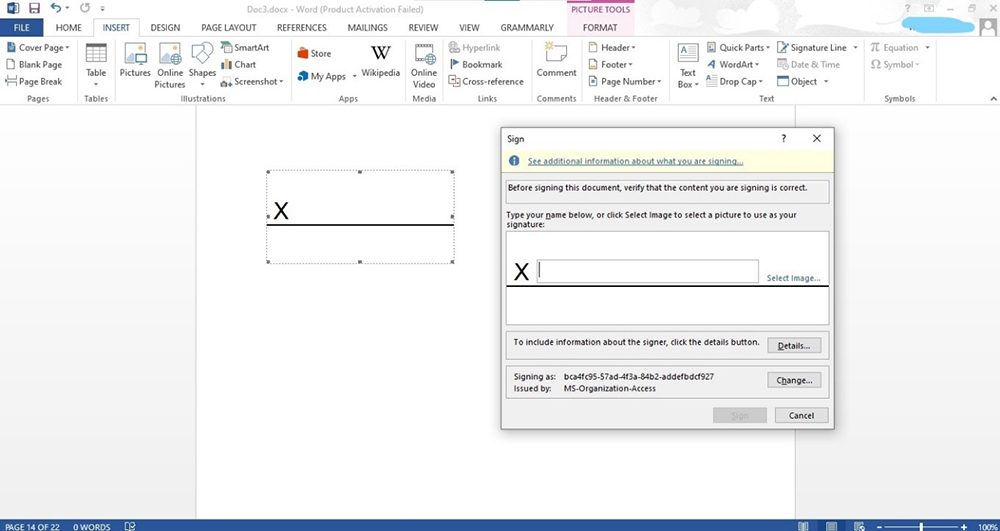
Step 3: An X
pop-up appears with your name below. You can either type in your name or select an image of your signature stored on the computer.
Step 4: Select your name or name of the organization besides the "signing as" option. Under "Issued by", select eMudhra digital signature certificate. Now click on the sign button to sign the word document.
Step 5: A pop-up box appears to verify the PIN of your token. Enter the PIN and click on "OK". A signature confirmation box appears with the message that your signature is successfully saved with the document. Click OK
.